While the Ringbearers struggles their way into Mordor, the rest of each of the Fellowships have their own part to play, as the largest battle in an age is about to erupt outside of Minas Tirith.
CJ
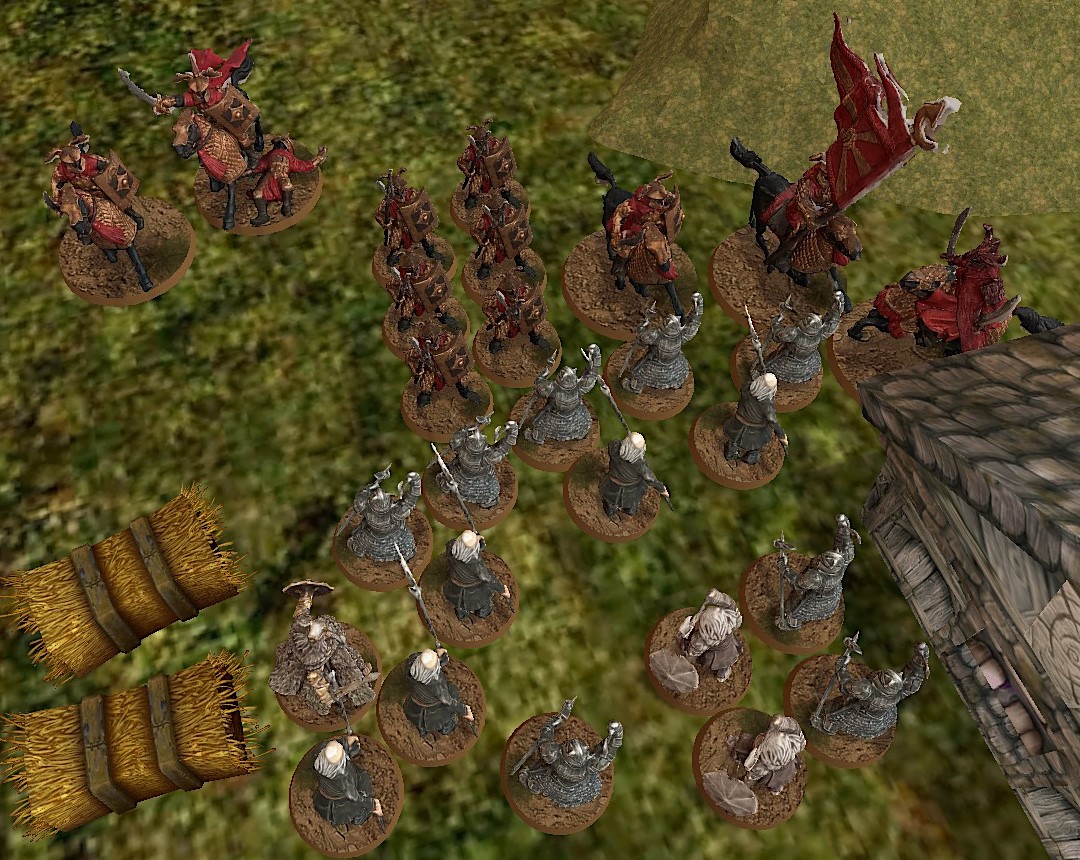
Scenario 19- Atop the Walls
Participants- Saruman, Grima, Irolas, Beregond and 24x Minas Tirith warriors
Evil- Zagdush, 2x Orc Captains and 36x Mordor orcs
The orcs surge over the walls and attack the defenders, one
fires his bow and takes away Beregond’s fate. The defenders strike back and
kills several orcs. A few Gondorians falls as Zagdush leads the retaliation. On
the defenders’ left, an orc captain leads a breakthrough.
Saruman blasts Zagdush allowing Irolas to charge him while
down, Zagdush is forced to spend all his might to avoid being killed. While
across the wall, the breakthrough captain beats down Beregond and in the
centre, Saruman loses all his fate to four orcs. It is Grima, of all people,
who fights back as he knifes another captain to death with his elven dagger.
The orcs swarm through the now decimated, left flank and
Saruman calls the defenders back to reform a shield wall. Grima kills another
couple of orcs on the other flank, leaving good one kill from a victory.
Saruman begins the next tun, blasting two spears and killing one. The orcs push
hard, desperately trying to slay the white wizard but can’t get to him. Grima
is injured and barely gets away with his life as the wall is held.
Kills
Saruman- 8
Grima- 3
Bravest- Saruman
GOOD WIN
Carried stats
Grima is fully replenished.
Saruman- 1m, 1will, 1f due to Denethor's Madness limits.
Scenario 20- Charge of the Rohirrim
Participants- Theoden, Eomer, Eowyn, Alfrid, Gamling, Deorwine, Elfhelm and 24x Riders of Rohan
Evil- Gothmog, Gothmog's Enforcer, 2x Morannon Orc Captains and 36x Morannon Orcs
As the Sun rises, the Rohirrim arrive with a vast horde of
cavalry, headed by King Theoden. He gives an inspiring speech before leading a
mass charge. They hit the orcs at full speed and call multiple heroic combats.
Eowyn scores a wound on Gothmog’s Enforcer. Deorwine is beaten by an Orc
Captain and just saves his own life by a thread (1w, 0f). Alfrid shows his
complete lack of experience and is immediately knocked from the saddle and
spends the rest of the battle on the floor screaming. Gothmog halts Eomer’s
charge and scores two wounds on the Marshal.
An orc captain gets the heroic move and the orcs counter
charge. In the counter counter charge, a rider slays the Enforcer with a
throwing spear. Eomer returns two wounds back upon Gothmog, but a captain kills
two riders in return.
Gothmog manages to get a charge and attacks
Eomer, bringing him down to 1w, 0f. Things look bleaker as a captain slays
Deorwine, but Elfhelm manages to slay another captain in return. Theoden and
Eomer charge together and both strike against Gothmog, who mimics. He manages
to win and Eomer is taken out of the fight. Theoden is enraged and the turn
after, charges and rides down the orc leader. The lines of Mordor are broken
and although the King would be slain by the Witch King later, this was a
pivotal moment for good.
Kills
Alfrid- 0
Fool- Alfrid
GOOD WIN
Carried stats
Alfrid is fully replenished before the finale.
Scenario 21- Denethor's Madness
Participants- Saruman, Grima, Beregond and Faramir
Evil- Denethor and 4x Citadel Guard
Beregond calls a Heroic move and rushes to the side to
distract the guards. Grima leaps from Saruman’s horse and runs around into a
guard as Saruman hits the other two. Grima is nearly speared but dodges it
narrowly.
Saruman charges Denethor atop the pyre as Beregond attacks
another two and Grima pulls Faramir free. Beregond loses his fate to his
opponents. Denethor is enraged but blocked off by Beregond, who proceeds to
hold him back for a couple of turns as Grima gets further away, but Saruman’s
horse is killed.
As time runs low for evil, they rush back to
seize Faramir and beat down Grima as Beregond is finally injured. But as a
guard carries Faramir to the pyre, the captain of Gondor stirs, and realisation
finally hits! Denethor throws himself on the pyre as madness and guilt seize
him.
Kills
Saruman- 1
Grima- 0
Bravest- Saruman
GOOD WIN
Carried stats
Saruman and Grima are fully replenished for the finale.
Scenario 22- The Docks of Harlond
Participants- Bard, Arathorn, Dwalin, Elladan, Elrohir, Halbarad, Angbor, 12x Rangers of the North and 12x Clansmen of Lamedon
Evil- Guritz, 3x Morannon Orc Captains and 36x Morannon Orcs
The ships of the corsairs arrive in the Docks of Harlond and
the orcs are surprised, when rather than the expected allies, a man, elf and
dwarf leap over the side. They are joined by a horde of clansmen, battalion of
rangers, who have come to their leader’s aid and the twin sons of Elrond.
The orcs rush forward with heroic marches, as the rangers
take aim. They find that the orcish armour is thicker than what they are used
to though as only two are killed. The good forces do, however, win the heroic
move off that follows and Bard with Arathorn leads the charge into the orcs.
Arathorn engages the leader, Guritz and deals a wound upon him, while around
him many clansmen and orcs are killed. Beside him, an orc Captain takes away
one of Bard’s fate. Arathorn responds by dealing a second wound then a third
over the next two turns. He slams his sword down through the skull headpiece
and slays Guritz where he stands.
To the right, a ranger is slain, and he is quickly followed
by Angbor as a hulking captain overpowers and stabs him, the leader of the
clansmen falls on the docks. Over on the left, Dwalin repays the debt, cutting
down a captain with his axe in a heroic combat with Bard. They rush past the
body and run for the gate to join the battle.
Arathorn leads the men in defeating the
remaining orcs as he cuts down a second captain and Elladan ends Angbor’s
killer. As victory, is all but confirmed, Arathorn is suddenly surrounded by a
wave of orcs in a last-ditch effort of spite and brought down with wounds but
is saved by the loyal rangers and clansmen.
Kills
Bard- 1
Arathorn- 2
Dwalin- 4
Bravest- Arathorn Fool- Bard
GOOD WIN
Carried stats
Bard, Arathorn and Dwalin are fully replenished before the finale.
Arathorn receives Anduril, Flame of the West to lead the free peoples.
Sam
Scenario 19- Atop the Walls
Participants- Saruman, Grima, Irolas, Beregond and 24x Minas Tirith warriors
Evil- Zagdush, 2x Orc Captains and 36x Mordor orcs
The assault upon the walls of Minas Tirith begins. Before
long the siege towers are opening and orcs pour over the battlements. Saruman
kills the first with a blast and a captain rushes into him. Both sides start
tearing each other apart as Saruman blasts another two orcs dead before taking
a wound from the attacking captain. Yet another is killed by Saruman’s magic
before he is suddenly left exposed as Zagdush and a captain kill the Gondorians
to either side of him.
The next turn is disastrous for good as many warriors of Minas
Tirith are killed by the onslaught of orcs and Zagdush attacks Gandalf, the orc
calls a heroic strike, despite Grima lurking nearby, and also gives in to his
berserk nature (str5, def4). Saruman manages to dodge the frenzied attack
despite losing. However, a huge gap has opened in the defences beside him.

The White Wizard puts up a terrifying aura and rallies his defenders into a much tighter formation. He then deals two wounds on Zagdush with a spear support. And before the orc and charge him again, blasts him back, slaying the evil leader. Very few defenders remain but they are only 5 kills away from victory. It’s all made very tight as Saruman suffers 3 wounds from a captain and orcs in that combat phase.
Saruman casts yet another blast that kills two orcs and calls out for the defenders to drive them back. Beregond is defeated by the orcs and Irolas is slain by both captains in the struggle, but Grima manages to plunge his elven dagger into an orc, making the kill tally 30 and scoring a victory for the defenders!
Kills
Saruman- 8
Grima- 2
Bravest- Saruman
GOOD WIN
Carried stats
Grima is fully replenished.
Saruman- 1m, 1will, 0f due to Denethor's Madness restrictions.
Scenario 20- Charge of the Rohirrim
Participants- Theoden, Eomer, Eowyn, Aldor, Gamling, Deorwine, Elfhelm and 24x Riders of Rohan
Evil- Gothmog, Gothmog's Enforcer, 2x Morannon Orc Captains and 36x Morannon Orcs
Theoden gives a speech that enflames the Rohirrim and they
ride forth. They hit the orc lines with fury unmatched as many call heroic
combats, Theoden and Gamling fail to move on but several others do e.g. Eomer,
who kills four orcs total and Aldor scores his first ever mounted kill. The
time of the orc is called by Gothmog the next turn as he charges Eomer with his
enforcer. Aldor calls a heroic combat and slays the orc he faces, galloping
full tilt and hitting the Enforcer causing a wound, allowing Eomer to fight
more fairly with Gothmog.
Elfhelm is nearly slain by a captain and Eowyn
is brought down by some orcs, while Eomer takes two wounds and is dismounted by
Gothmog. They fight on and on, but just as the orcs are shattered, the Marshal
cuts down the orc leader at last. Beside him Aldor manages to slay the Enforcer
from atop his horse.
The orcs beat a hasty retreat but before the Rohirrim can celebrate, they see the Mumaks of the Harad coming towards them.
Kills
Aldor- 3
Bravest- Aldor
GOOD WIN
Carried stats
Aldor is fully replenished for the finale.
Scenario 21- Denethor's Madness
Participants- Saruman, Grima, Beregond and Faramir
Evil- Denethor and 4x Citadel Guard
When word reaches Saruman of what Denethor is up to, he
rushes to the summit of Minas Tirith to try to stop it.
Beregond is there first and finds himself
quickly attacked but repels it. He then calls a heroic move allowing Saruman to
charge but is knocked out quickly. Saruman and Grima gallop past and the wizard
attempts to blast Denethor away from the pyre but it is resisted. The guards
pile into him and kill his horse as well as giving him two wounds. The next
turn both of them are attacked and cornered. Grima is quickly beaten up and
Saruman too after losing their third priority in a row. Saruman very nearly
dies but is saved by the single might he had. They can only watch as the crazed
Denethor burns himself and Faramir before them, they have failed.
Kills
Saruman- 0
Grima- 0
Bravest- Saruman Fool- Grima
EVIL WIN
Carried stats
Saruman and Grima are fully replenished for the finale.
Scenario 22- The Docks of Harlond
Participants- Theodred, Haldir, Dain, Elladan, Elrohir, Halbarad, Angbor, 12x Rangers of the North and 12x Clansmen of Lamedon
Evil- Guritz, 3x Morannon Orc Captains and 36x Morannon Orcs
The ships of the Corsairs arrive at the Docks of Harlond but
the orcs are surprised when, rather than their allies, a man in Rohan armour,
an elf and a heavily armoured dwarf leap out followed by a horde of rangers, a
unit of clansmen of Lamedon and elven twins. Theodred and Haldir have barely
recovered from their injuries sustained at Helm’s Deep but insist on playing
their part. Haldir quickly loads his bow and fires, killing an orc as they rush
towards these new arrivals. An orc captain barrels into Haldir and sends him
flying, knocking him out cold. Theodred receives another captain and shields
him off for two turns as the elven twins attempt to assist him. He eventually
manages to pull back from the danger and Dain leaps in onto a third captain.
The twins cut their way through and get to the rear of the enemy. On the left,
Guritz slays a ranger.
Theodred and Elladan pin down a captain and deal
a wound as a clansman stands up to Guritz and lands a heavy wound upon him with
a broadsword. At this point a wave of death sweeps the evil force, all three
captains are slain by Dain, Theodred and Elrohir. Morale soars for the good
forces as they surround their enemies and prepare to mop up. Guritz is caught
and slain as Dain’s hammer crushes both the skulls on his shoulders.
Victory is now all but confirmed for the forces of Good, when
disaster strikes; a lone orc that hasn’t been tagged rushes from the crowd,
knocks Theodred down (Theodred rolled a 5 that suddenly tipped over becoming a 4 against the
orcs 5!) and even Halbarad’s interference in the fight doesn’t stop the orcs
blade stabbing downwards and slaying the Prince of Rohan. A sudden defeat
knocks the wind out of the assault. Despite this setback, the good forces manage to successfully
defend the White City as Theodred promised to Aragorn but he gave his life for
it.
Kills
Theodred- 1
Haldir- 1
Dain- 5
Bravest- Dain Fool- Theodred
EVIL WIN
Carried stats
Theodred is slain on the Docks of Harlond and his body taken
to join his father to be laid to rest.
Haldir and Dain are fully replenished for the finale.
The leaders of the victorious forces of good meet to decide
their next move. Eomer takes up command of the Rohirrim in the absence of
Theoden and Theodred. Hurin honours the lost King Elessar by vowing to lead the
Gondorians to the Black Gate with Anduril, which Elrond had sent with his sons
to inspire the Men of the West.
Will
Scenario 19- Atop the Walls
Participants- Gandalf, Denethor, Minas Tirith Captain, Beregond and 24x Minas Tirith warriors
Evil- Zagdush, 2x Orc Captains and 36x Mordor orcs
Gandalf and Denethor lead the defences of the walls as the
Orc army approaches. The Siege towers hit, and orcs pour onto the walls.
Denethor leads from the front and braces as he takes a charge from a captain
and orcs. Gandalf sorcerous blasts an orc killing him and a spear but also knocking
down Denethor and wounding him. The orcs pounce and the Steward is removed from
the fighting in the first turn.

Gandalf casts terrifying aura and charges some orcs. The
Gondorian archers at the back engage a group of orcs and Zagdush takes a wound
in the combats. By the end of turn 2, nine orcs are dead. The warriors of Minas
Tirith hold the orcs back but Captain Nearamir is beaten to the floor in the
fighting and dragged away by his troops. Beregond has a near miss as he uses his fate
to dodge a sweep of a sword and Zagdush closes in on Gandalf with a heroic combat.
The next turn as he prepares to charge the White Wizard, a sorcerous blast sends
him flying from the battlements.

Gandalf begins turn 6 by blasting another pair of orcs but Beregond
is finally beaten down by the orcs as his heroic archers are finally
overwhelmed and killed. Another blast kills an orc spear and then Gandalf slays
two more in combat to lift good’s kill count to 29.
The next turn Gandalf is surrounded and beaten down
to 1w, 1f. But he gets priority in Turn 8 and blasts an orc to reach 30, this
orc knocks down the last warrior of Minas Tirith left. Orc archers fire wildly
and an arrow scratches his staff. The distraction is all that’s needed, and
combined with the floored ally trapping him, the orcs defeat the Wizard, the
walls fall as Gandalf flees.
Kills
Gandalf- 12
Denethor- 0
Bravest- Gandalf
DRAW
Carried stats
Denethor is fully replenished.
Gandalf- 1m, 1 will, 1f
Scenario 20- Charge of the Rohirrim
Participants- Theoden, Eomer, Eowyn, Damrod, Gamling, Deorwine, Elfhelm and 24x Riders of Rohan
Evil- Gothmog, Gothmog's Enforcer, 2x Morannon Orc Captains and 36x Morannon Orcs
The Rohirrim arrive with the dawn. Theoden gives an inspiring speech and leads the charge. They quickly hit the orcish lines and both Orc Captains call heroic combats as does Elfhelm. Elfhelm kills two orcs with a second might and charges the two spears behind. The first captain runs through the gap now there and charges Eomer from behind. The second loses his fight but avoids a wound. This is followed by many orcs being killed in the fighting. Gothmog, with 7 dice, only manages to roll a 3 highest then spends all 3 might to match Eomer's 6 and loses the roll off. CJ calculated the odds of that being 0.39%. Eomer then kills Gothmog with ease, the first turn of combat finally ends.
Damrod manages to kill two orcs using a heroic combat, while a rider wins a 1 on 1 with a captain and to the dismay of evil slays him. Elfhelm is assaulted by the Enforcer and takes two wounds but saves himself with fate. But is brought down the following turn by the determined orc. Gamling manages to bring down the second captain. As the scenario is coming to an end, Damrod makes it clear who is the victor as he runs down the Enforcer and slays him.
Kills
Damrod- 4
Bravest- Damrod
GOOD WIN
Carried stats
Damrod is fully replenished for the finale.
Scenario 21- 'Not Denethor's' Madness
Participants- Gandalf, Denethor, Beregond and Captain of Minas Tirth
Evil- Captain of Minas Tirth (Denethor's stats) and 4x Citadel Guard
Gandalf arrives with Denethor to stop Whereveryouaramir (W) from burning Nearamir following his injuries upon the walls. Beregond waits in the tunnel to allow Gandalf to catch up. Denethor dismounts and attacks two guards. The wizard then blasts a third into the combat, killing the blasted guard and wounding Denethor. He then hurries to the pyre, dismounts and pulls Nearamir from the flames. W then turns on him in rage! But Gandalf manages to fight him off.
Gandalf calls a Heroic move and drags Nearamir away from the crazed captain. He is attacked again but avoids injury. Beregond spends a fate. A couple of turns later, Denethor is slammed into a wall and knocked out of the fighting. Quickly followed by Beregond. But due to key priorities being won, Gandalf has succeeded in keeping Nearamir away from his would be killer. W completely breaks down and flees the building, throwing himself from the top of Minas Tirith.
Kills
Gandalf- 1
Denethor- 0
Bravest- Gandalf
GOOD WIN
Carried stats
Gandalf and Denethor are fully replenished for the finale.
Scenario 22- The Docks of Harlond
Participants- Boromir, Faramir, Irolas, the King of the Dead, 20x Warriors of the Dead and 6x Riders of the Dead
Evil- Guritz, 3x Morannon Orc Captains and 36x Morannon Orcs
The boats of the Corsairs arrive at the Docks and the orcs are caught off guard, seeing three battered Gondorians leaping over the side. Before they can even think, suddenly an army of ghostly warriors rushing towards them. Elrond had sent Anduril, Flame of the West, to aid the Gondorians and he had used it to convince the Dead to fight for their Oaths,
The orcs recover and form a defensive wall to either side of the fountain. The forces of good rush forward and attack to their left. Faramir engages a captain. While the King of the Dead forms a line to cover their flank from the right. The orcs rush forward to engage it, sending 4 to cover a small alleyway with two riders rushing up. A captain in that attack calls a heroic combat to attack more of the dead. Guritz also calls one to pull away Boromir's spear support.
Faramir mistimes an attack and takes a wound to some orcs and beside him, despite 8 attacks coming from Galadriel's hair, Irolas loses to a captain and takes two wounds, saving himself with fate. Guritz loses his combat and takes two wounds from the Dead, using a might and fate to survive. The orcs begin to hammer at the flank's defenders. The Dead riders suddenly, swing around the house and attack the orcs from behind.
Boromir takes his chance in the confusion and brutally hacks down the Orcish leader, Guritz has fallen. A captain on the flank is slain by the Dead and another quickly falls to Irolas' fury! The Orcs are now heavily on the backfoot as Good crashes through their lines with such momentum. The three Gondorian heroes make a break for the gate as the Orcs finally shatter the flanks defence but too late. Boromir leads Faramir and Irolas into the Pelennor and victory!
Kills
Boromir- 4
Faramir- 1
Irolas- 1
Bravest- Boromir Fool- Irolas
GOOD WIN
Carried stats
The three hunters are all replenished for the finale.
The leaders of the free peoples all encourage Boromir to wield the sword of the King of Gondor, as a symbol of hope in their final battle.
With Minas Tirith successfully defended, the forces of Good have been able to lick their wounds and decide that the best chance that they can give their chosen Ringbearer is a diversion. The next part will be the finale: 'For Frodo/Bilbo'!